You know your business, you know your users, and you have some user needs and tasks. Great!
But what’s the next step?
You first need to create a website to get your idea out there, right? Yes and no. There are a lot of tools that you can use to show people your idea, but only some of them are engaging. People want to interact with what you offer, which is why they need a website prototype.
A prototype is the earliest form of a product, almost identical to the final product. It is the first building block you need to start your journey of creating something new.
In this blog, we’ll walk you through the steps of creating a website prototype that will help you visualize your end product and serve as a guide for development.
What is a website prototype?
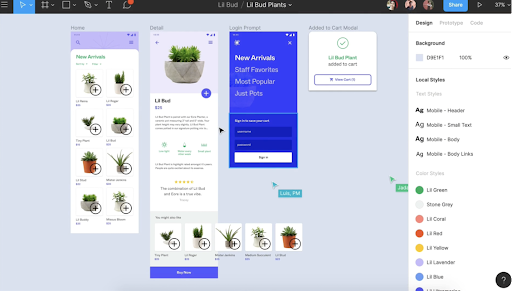
A website prototype is a preliminary website model used to test different aspects of the website before it is created. This can include the layout, design, function, and user experience.
A website prototype allows designers to experiment with different layouts and design elements and test the user experience and flow of the website before committing to any design. Prototyping can help identify and resolve potential issues or problems before the website is fully launched, resulting in a more polished and functional final product.
How does a website prototype benefit the development process?
Here are some reasons why a website prototype benefits your website development process:
1. Allows for early testing and feedback
Creating a website prototype early in the development process allows designers and developers to test their ideas and gather feedback from potential users. This can help identify any issues or problems with the design before it is fully developed, saving time and resources in the long run.
2. Helps clarify and refine the design
By creating a physical or digital representation of the product i.e. a website prototype, designers can better understand how it will function and identify any areas that need further clarification or refinement. This can improve the overall quality and usability of the final product.
3. Allows for better communication
A website prototype can be a visual aid to help designers and developers communicate their ideas to others, such as clients or team members. It can also help stakeholders better understand the product’s functionality and design, leading to more informed decision-making.
4. Reduces the risk of errors
By testing out ideas and concepts early in the development process, designers and developers can identify and fix any problems before they become major. This can reduce the risk of errors in the final product, leading to a smoother and more successful development process.
5. Speeds up the development process
By identifying and addressing issues early on, a website prototype can speed up the development process and save time in the long run. It can also streamline the development process by providing the team with a clear direction and focus.
Are mockups, wireframes, and prototypes the same thing?
Wireframing, mockups, and prototyping are three different things, but they often need clarification for each other. While all three terms may be used in the design process, they each have unique purposes and features.
Here’s a short definition for each term:
Wireframe: A wireframe is a low-fidelity prototype that outlines the structure and layout of a design or product. It is used to map out the user flow and layout of the product without getting into the details of design elements such as colors and fonts.
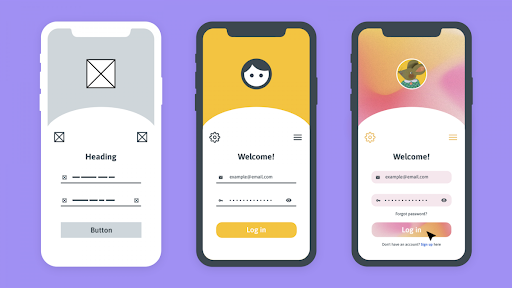
Mockup: A mockup is a visual representation of a design or product. It’s a high-fidelity, static prototype that showcases the look and feel of the final product. It is used to give stakeholders and team members a clear understanding of the final product.
Prototype: A prototype is a functional design or product model used for testing and validation. It can range from a low-fidelity wireframe to a high-fidelity mockup, depending on the stage of the design process. Prototypes are used to gather feedback and make necessary changes before the final product is developed.
Here’s a table that outlines the key differences between wireframes, mockups, and prototypes:
| | Wireframe | Mockup | Prototype |
| ———- | ———- | ———- | ———- |
| Purpose | To outline the basic structure and layout of a user interface | To visualize the design and layout of a user interface. | To test and demonstrate the functionality of a user interface. |
| Level of Detail | Low | High | High |
| Visual Appearance | Simple and basic | Detailed and polished | Detailed and polished |
| Interactivity | None or limited | None or limited | Full |
| Time and Cost | Quick and low cost | Moderate cost and time | Higher cost and time |
Different ways of creating a prototype
There are several ways to create a prototype, depending on the complexity of the product and the resources available. Here are three common approaches:
1. Paper Prototyping
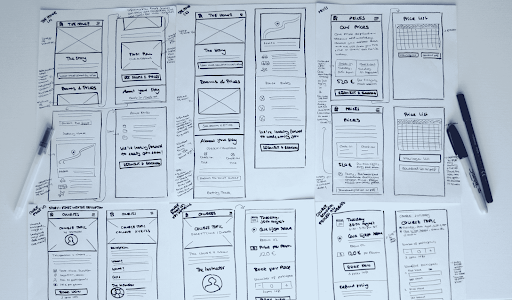
This low-tech method involves creating a physical representation of the product using paper and pencil. This can be a quick and easy way to test ideas and understand how the product will work.
Pros of paper prototype
- Low cost method
- Quick and easy
- Easy to share
- Not requirement for special programs or apps
Cons of paper prototype
- Limited details
- Not iterative
- Not scalable
- Hard to make changes
2. Prototyping with professional apps
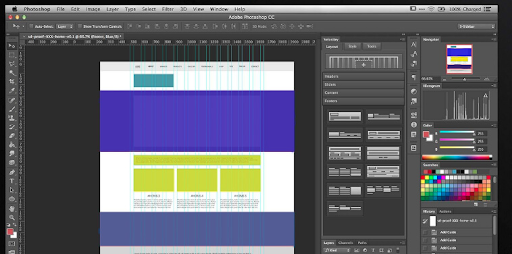
A variety of professional software tools are available for creating prototypes, such as Adobe XD, InVision, and Sketch. These tools often have features and templates to help you create high-fidelity prototypes that resemble the final product.
Pros of using professional apps for prototyping
- User-friendly and intuitive
- Wide range of features
- Create high-fidelity prototypes
- Saves time
- Editing capabilities
Cons of using professional apps for prototyping
- Requires investment
- Requires knowledge of using the app
- Makes you dependent on the app
3. Prototyping with online tools
There are also a number of online tools that allow you to create prototypes without needing specialized software. Some popular options include Figma, Balsamiq, and Proto.io.
Pros of creating a prototype with online tools
- No cost or low cost
- Easy to use
- Collaborative features
Cons of creating a prototype with online tools
- Limited features
- Compatibility issues
- Requires knowledge to work your way around the tool
- May take time to create the prototype
How to create a website prototype in 7 simple steps
Step 1: Define the Scope
Before you begin creating your website prototype, it’s important to define the project’s scope and determine what you want to accomplish. Some questions to consider include the following:
- What is the overall goal of the website or app?
- Who is the target audience for the website or app?
- What features or functionality do you want to include in the website prototype?
- How much time and resources do you have available for the website prototype?
Defining the project’s scope will help you determine the appropriate level of detail and functionality for your website prototype and ensure that you stay focused on the most critical aspects of the design.
Step 2: Research
Before you begin creating your website prototype, it’s important to research to understand the needs and goals of your target audience, as well as the competitive landscape of the market. Some research activities you may want to consider include:
User research: Conduct interviews or surveys with potential users to understand their needs, goals, and pain points. This can help you identify the key features and functionality that should be included in the prototype.
Market research: Analyze the market to understand the competitive landscape and identify any trends or opportunities that could inform the design of the website prototype.
User personas: Create user personas to represent the different types of users using the website or app. User personas can help you understand the needs and goals of different user groups and ensure that the website prototype is designed to meet their needs.
User journeys: Create user journey maps to understand users’ steps as they interact with the website or app. This can help you identify any bottlenecks or areas for improvement in the user experience.
Conducting research will help you create a website prototype that is well-aligned with the needs and goals of your target audience and has a better chance of success in the market.
Step 3: Sketch
Once you have defined the project’s scope and conducted research to understand the needs and goals of your target audience, you can begin sketching out your prototype.
Sketching is a useful way to explore and iterate on different ideas and concepts quickly and can help you get a sense of the overall layout and structure of the website prototype.
Here are some steps you can follow to sketch out your prototype:
Start with rough, low-fidelity sketches: Use pencil and paper to quickly sketch your ideas without worrying too much about the details. Focus on the overall layout and structure of the prototype, and don’t worry about making the sketches look polished or perfect.
Use sketching templates or grids: To help you create a more structured and organized layout, you can use sketching templates or grids such as the 8-point grid system. These tools can help you create a more balanced and cohesive layout.
Experiment with different layouts: Try different layout options and see what works best for your prototype. Consider the overall flow and hierarchy of the content, and think about how users will navigate through the prototype.
Refine and polish your sketches: Once you have a rough sketch that you are happy with, you can start refining and polishing the design. Add more detail and visual elements to the sketch, and consider making the prototype more visually appealing.
Sketching is an essential step in the prototype development process. It allows you to explore and iterate on different ideas and concepts before moving on to the next stage.
Step 4: Design
Once you have a clear idea of the layout and structure of your website prototype, you can begin designing the prototype’s visual elements. This may involve creating mockups or high-fidelity visual designs using a design tool such as Sketch, Adobe XD, or InVision.
While creating the design, keep two important things in mind:
- Choose a design style: Decide on the overall look and feel of the website prototype, and choose colors, fonts, and other visual elements that align with the brand and the target audience.
- Create a visual hierarchy: Use techniques such as font size, color, and whitespace to create a visual hierarchy that guides users through the prototype and helps them understand the most important information.
Designing the visual elements of the prototype will help you create a polished and visually appealing interface that meets the needs and goals of the user.
Step 5: Feedback
Once you have created a functional website prototype, gathering user feedback is important to identify any issues or areas for improvement.
Since you’ve done the target audience research in the research stage, it’s time to get relevant feedback from that audience.
The process for collecting feedback on your website prototype can look something like this:
Determine what you want to learn: What specific feedback are you looking for? Do you want to know if the prototype is easy to use, meets the user’s needs, or if any specific issues need to be addressed? Clearly defining your goals will help you get the most valuable feedback.
Choose a feedback method: There are several ways to gather feedback on a prototype, including user testing, focus groups, surveys, and online feedback tools. Choose the method that best fits your goals and resources.
Analyze the feedback: Once you have gathered feedback, take the time to analyze the results and identify any patterns or trends. Look for common issues or areas of concern, and use this information to inform your next iteration of the prototype.
Gathering feedback helps you find loopholes in your product from the end users’ perspective, identify any mistakes, or areas for improvement, and ensure that the final product meets the user’s needs.
Step 6: Refinement
Once you have gathered feedback on the website prototype, it’s time to make any necessary refinements and improvements.
Refining the design means going through each element in your design and ensuring that it works as expected. This includes testing the interactions between various website elements such as buttons, menus, forms, etc.
Stages of refinement include the following:
Identify areas for improvement: Based on your feedback, identify any areas of the prototype that need to be improved or revised.
Make necessary changes: Make any necessary changes to the prototype to address the issues identified in the feedback. This may involve making changes to the prototype’s layout, design, or functionality.
Test again: Once you have made the necessary changes, it’s a good idea to test the revised prototype to ensure that the changes have improved the user experience. You can use the same testing methods you used in the initial testing phase to gather feedback on the revised prototype.
Iterate: If necessary, continue to iterate on the prototype until it meets the needs and goals of the user. This may involve repeating the feedback and refinement process multiple times until the prototype is ready for the final product.
Once you’ve made all these changes, it’s time to start working on the final product!
Step 7: Final development
The final development stage is the last step in the process of creating a website prototype. During this stage, all the prototype elements are finalized and brought together into a cohesive whole.
The final development stage includes the following:
- Fine-tuning the layout and design: This involves making final adjustments to the layout and design of the prototype, such as adjusting the spacing between elements or tweaking the color scheme.
- Adding interactive elements: If the website prototype includes any interactive elements, such as forms or buttons, these should be added and tested to ensure they are functional and user-friendly.
- Integrating back-end functionality: If the website prototype includes any back-end functionality, such as a database or server-side processing, this should be implemented and tested.
- Making any necessary final adjustments: Based on the testing results, make any necessary final adjustments to the prototype to ensure it is ready for launch.
After the final development stage, the prototype is ready to be launched as a fully functional website.
Technical lingos that you must know
1. Standard UI action terms (verbs)
Standard UI action terms (verbs) refer to a user’s actions within a user interface (UI). These terms are typically used to describe the functionality of buttons, links, and other interactive elements.
Here are some common Standard UI action terms (verbs) that are used in user interfaces (UIs):
Click: Action of selecting an element by clicking on it with a mouse or touchpad.
Type: Type is used for all input modalities, including keyboard (typed), touch (typed on mobile), pen/stylus (written), voice (spoken), and others.
Swipe: Dragging an item with a finger or stylus that moves in a single direction without releasing it until the movement stops.
Press: To touch a button or other element that triggers an event. For example, pressing a button on a game controller triggers an action, such as firing a weapon.
Drag: To move something by holding down one point on it while moving another point around on the screen.
2. Standard UI identifier terms (nouns)
Standard UI identifier terms (nouns) refer to the UI elements used to identify and describe specific features or functionality. These terms are often used to name buttons, links, and other interactive elements.
Some common standard UI identifier terms include:
Button: A UI element that allows a user to initiate an action when clicked or tapped.
Field: A UI element that allows a user to enter or select data, such as a text field or a dropdown menu.
Icon: A small visual symbol representing a function or action, such as a trash can icon for deleting an item.
Dialogue/Dialog: A UI element that allows users to interact with the system more conversationally or interactively, such as a chatbot or a voice assistant.
Panel: A UI element that displays information or controls in a separate screen area.
Pane: A UI element that divides the screen into separate areas, typically used to display different types of information or controls. Users can resize and scroll through the pane area.
Tab: A UI element that allows users to navigate between different views or sections of a website or application.
Wizard: A wizard is a UI element that guides a user through a series of steps or processes, typically used for complex or multi-step tasks.
3. Input, output, and helper elements
Input, output, and helper elements are UI elements used to facilitate user interaction with a website or application.
- Input elements are UI elements that allow a user to enter or select data, such as text fields, dropdown menus, and checkboxes.
- Output elements are UI elements that display information or results to the user based on the input. Output elements include text labels, alerts, or error messages.
- Helper elements are UI elements that provide additional context or guidance to the user. They include notifications, breadcrumbs, and progress bars.
Prototyping tools that can help
Many prototyping tools can help with creating prototypes for websites. Some of the popular options include:
InVision: InVision is a prototyping and collaboration tool that allows you to create interactive prototypes of your website designs. It includes a range of design and prototyping features and tools for sharing and collaborating with team members.
Figma: Figma is a cloud-based design and prototyping tool that allows you to create and collaborate on website designs in real time. It includes a range of design and prototyping features and tools for sharing and collaborating with team members.
Adobe XD: Adobe XD is a design and prototyping tool part of the Adobe Creative Cloud suite of tools. It allows you to create interactive prototypes of your website designs and includes various design and prototyping features.
Sketch: Sketch is a digital design and prototyping tool for Mac that designers often use to create wireframes, mockups, and high-fidelity prototypes for websites and mobile apps. It includes a range of design and prototyping features and support for plugins and design libraries.
Webflow: Webflow is a platform that allows designers and developers to create and host responsive websites and web applications. It includes a visual editor for designing and building websites and tools for hosting and publishing your finished website.
Overall, many tools can help with prototyping websites, and the best one for you will depend on your specific needs and workflow.
Done with your website prototype? What’s next?
Once you have created a website prototype, it is important to test it and gather feedback from users to ensure that it meets the needs and expectations of your target audience. This process, known as “user testing” or “usability testing,” can help you identify any bug, issues, or improvements that need to be made to the prototype before it is developed into a final product.
There are a variety of tools and methods that you can use to collect feedback on a prototype, including online surveys, focus groups, and usability testing software.
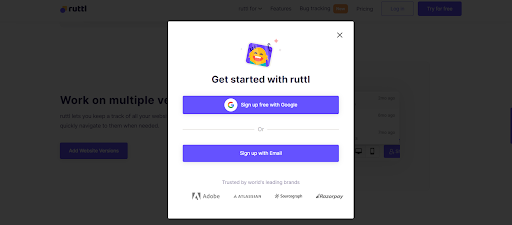
ruttl is one such tool that can help you gather feedback on your prototype by allowing you to share a link to the prototype with testers, who can then provide feedback through annotations and comments.
Using a tool like ruttl can make collecting and organizing feedback from multiple sources more accessible. It provides tools for organizing and prioritizing feedback, so you can easily identify areas for improvement and make informed decisions about your design.
Here’s how you can use ruttl to get feedback on your prototype:
Step 1: Sign up for a ruttl account and create a project. You’ll need to provide basic information about your projects, such as their name and the website link.
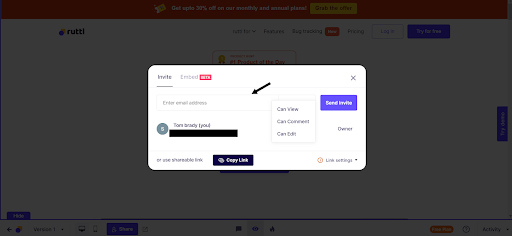
Step 2: Invite your team or stakeholders to review the prototype. You can do this by sending them an invite link or by entering their email addresses.
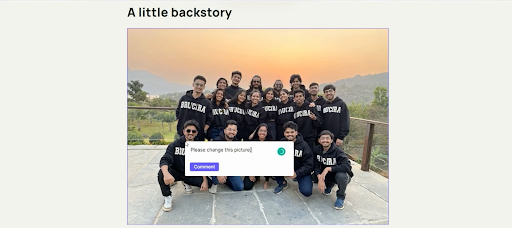
Step 3: Collaborate with your team in real time by leaving comments on the prototype and discussing feedback in the chat window.
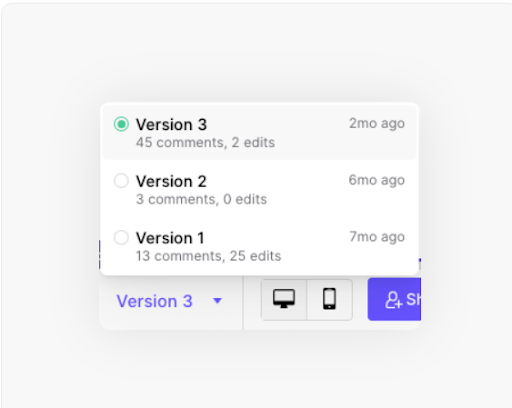
Step 4: Review and analyze the feedback you receive to make informed decisions about your prototype. ruttl allows you to keep track of feedback with multiple version histories and understand how people interact with your prototype.
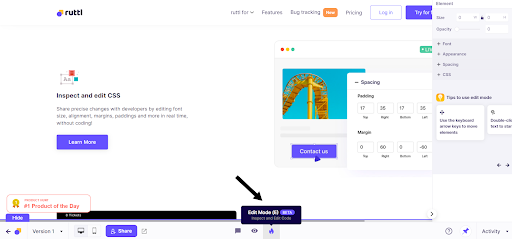
Step 5: Make changes to your prototype based on your feedback in Edit mode and repeat the process until you’re satisfied with the results.
Conclusion
Creating a website prototype is a crucial step in the design process, as it allows you to test and iterate on your ideas before committing to a final design. By following the steps and tools outlined in this guide, you can easily create a functioning prototype of your website.
Once your prototype is complete, gathering feedback from stakeholders and users is important to ensure that it meets their needs and expectations.
ruttl is a useful tool for this purpose, as it allows you to easily share your prototype with others and gather feedback through annotated comments and suggestions. By using ruttl to gather feedback on your website prototype, you can ensure that your final design is the best.